


How to Make Social Media Images (& others!) for Free

Canva for Social Media Images
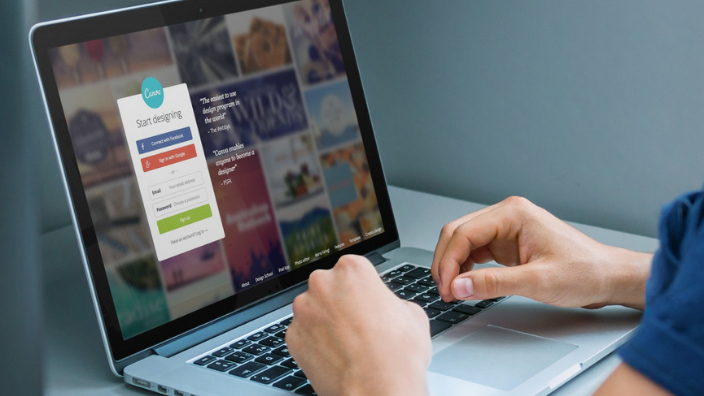
Have you heard of Canva? Canva is a graphic design platform that has a free option and lets you do everything (well, nearly everything!) you pay a graphic designer to do. Now don’t get me wrong, of course using a graphic designer is your ultimate solution, but with all our digital platforms being image based, it can be expensive to get a designer to do them all for you. Even at HotsWots, where I have a graphic designer, he is often busy on client work and doesn’t have time to create all my social media images and blog post images. You know the saying – ‘clients come first’!
So, if you aren’t very techy or think you couldn’t possibly work out how to make your social media images, I am going to give you a walk through how you can get up and running quickly and easily.
Canva, has free and paid options but today I’ll show you how to make a gorgeous image for Pinterest for free. Anywhere you see the little yellow crown, it means you can upgrade to a paid option.
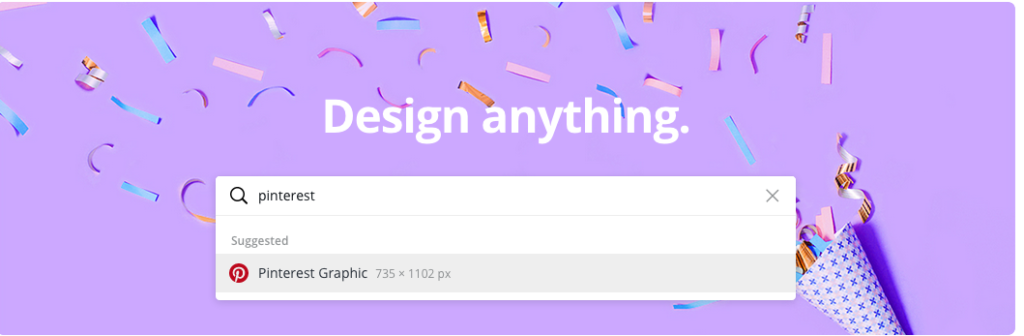
1. Set up your account at www.canva.com
You can type into the Search bar the type of image you want to design, and you will see I have typed in Pinterest and it has ‘suggested’ Pinterest graphic with the correct dimensions.
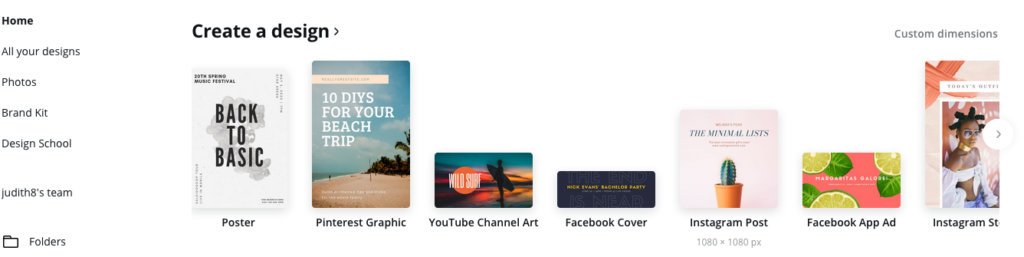
Alternatively, scroll down and you will see Create a Design and you can choose Pinterest Graphic by clicking on it.
2. Design Options
Once you have selected your image type, you will see your blank Pinterest image and a range of options on the left in a vertical menu bar. You can choose a ready-made template and change it to suit your requirements or you can build something from scratch.
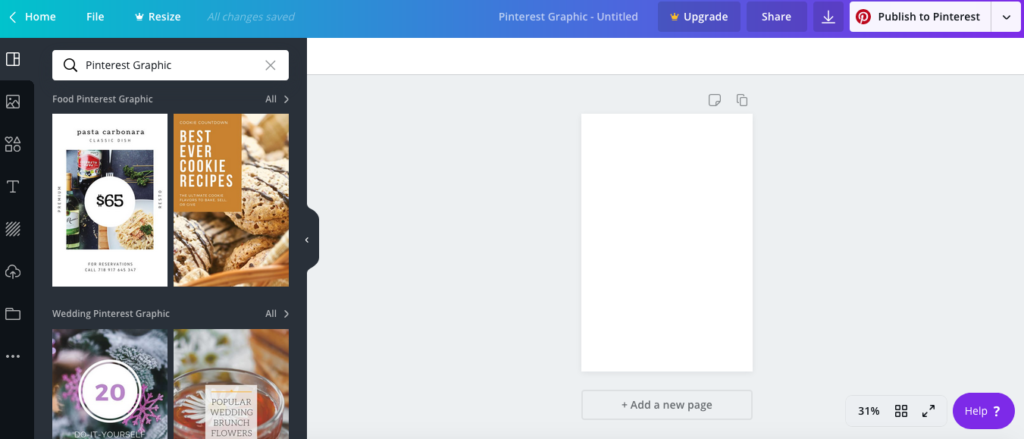
Let’s look at your options as we move down the menu bar on the left-hand side of your screen starting at the top and moving down:
Top 4 Icons
- The top icon is your Template option and you can see that you have some categories Food, Wedding, Birthday etc. There is a category search bar as well and I generally type in Pinterest Graphic Marketing but really you can adapt any of the templates no matter the category if you like the design.
- Next icon going down the bar is Photos and again, they are categorised. Some are free and some are paid.
- Elements is the next one down and these are all your icons and shapes, and these are categorised as well. You can add coloured lines, dots, icons or whatever your heart desires to make your Pinterest image attractive.
- T is for Text and you have some options put into examples for you to choose from or you can add different size headings or body text and update the font.
Bottom 4 Icons
- The diagonal lines icon is for Backgrounds.
- Upload of your own images is the cloud with the arrow and here you can add logos and any images you already have. I often add free images here if what I am looking for is going to cost me in Canva.
- The second last icon is for Folders (most of it paid).
- Last, but not least, the 3 x dots icon will link you to some Apps for free image sites, your Facebook photos, your Instagram photos plus emojis and some other apps.
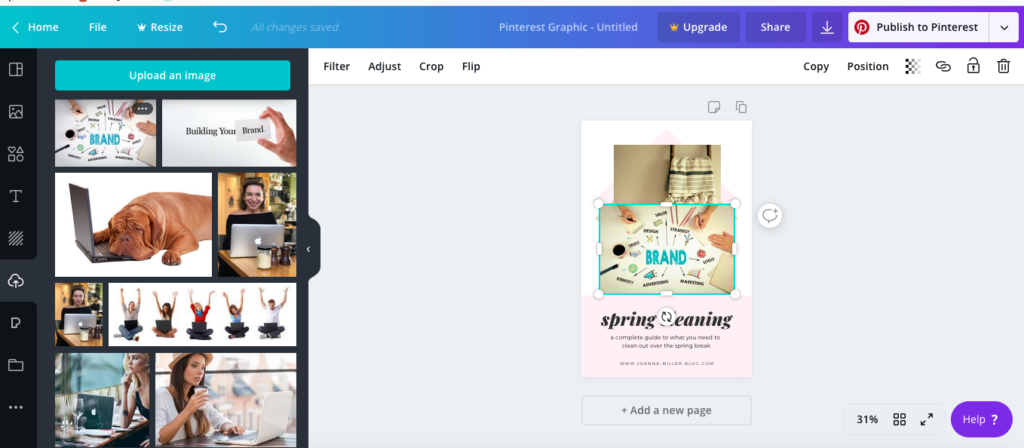
3. Building the Pinterest Image
We will choose the template option for this example. I have clicked on a template I like, and you will see that it automatically populates the blank image on the right.
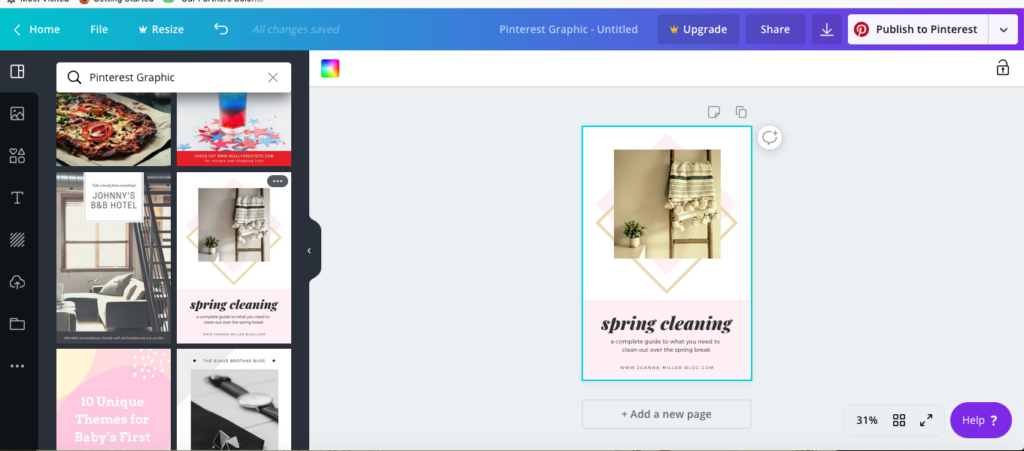
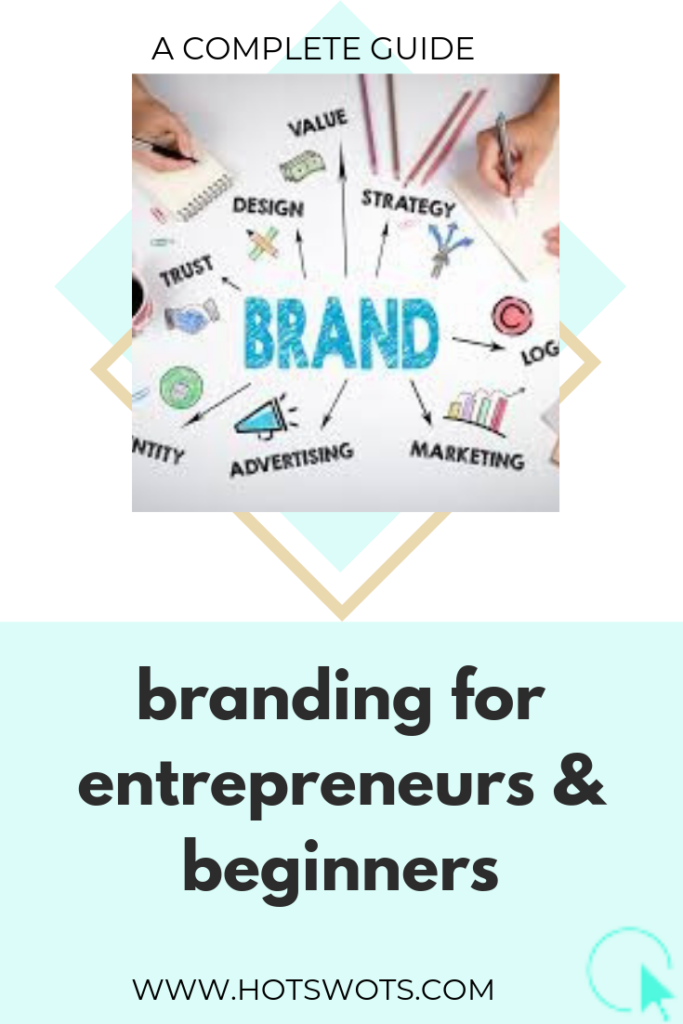
Now we will edit it to suit our needs. I am going to make an image to link back to my blog post about Branding Strategy for Beginners because it is doing well and driving traffic to my site.
First, we need to change the image on Spring Cleaning
- I have uploaded an image I wish to use on branding. Select the cloud icon, click on Upload an Image aqua button at the top and select your own image. Click on it and it will move to your template. You will see that you need to resize it to fit the image section by dragging in or out the small white buttons on the corners and sides of the image. Just try to make it the same size as the image you’re replacing. Once it fits, it will replace the image that is there.
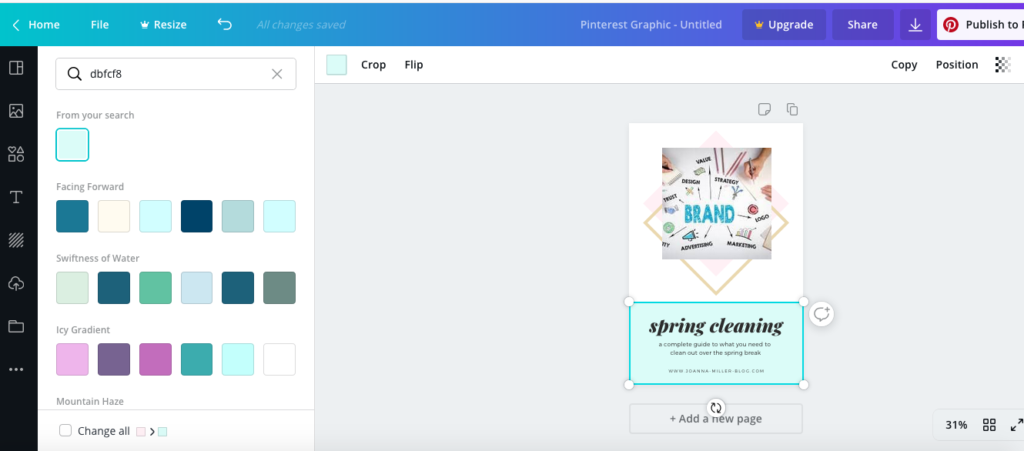
- Background colours now can be changed, and I will insert my HotsWots branding colours to replace the pink. You can also change the white background if you wish, as well as the gold square behind the image. So, get creative! To change colours, just hover over the relevant area. Select the small pink square in the menu bar next to Crop. This will bring up the colour palette. I am going to type in my hex colour number from my branding and select that and presto, the pink has changed to pale aqua. Continue to change any other areas you wish by clicking on it and then updating.
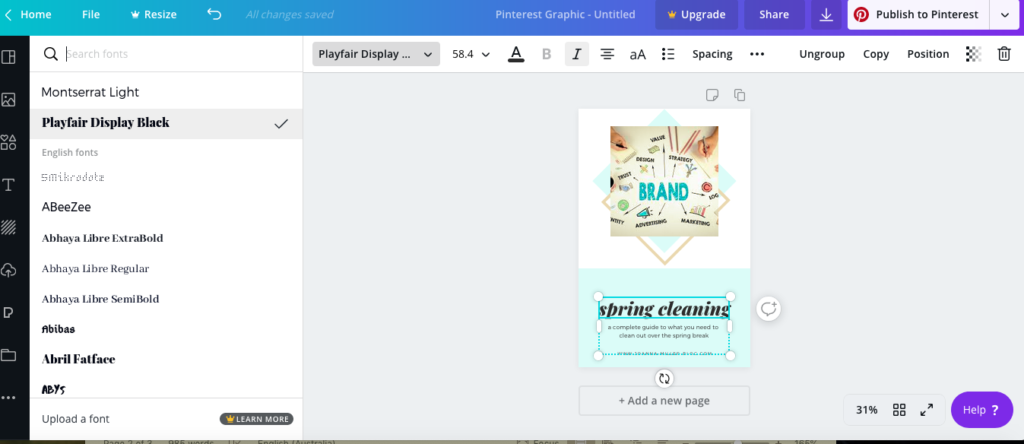
- Click on the Text area and either just select and change the content or you can select a different font, font size and font colour from the menu bar above. You can change alignment from centre to left or right and spacing. If you can’t make your text work by typing over what is there, just delete and choose T in your sidebar and insert your own options. To move lines of text select until you get the little black cross which is the ‘grab’ and just move it where you want it. You need to select the text inside the text box with your cursor to delete and type in your own text.
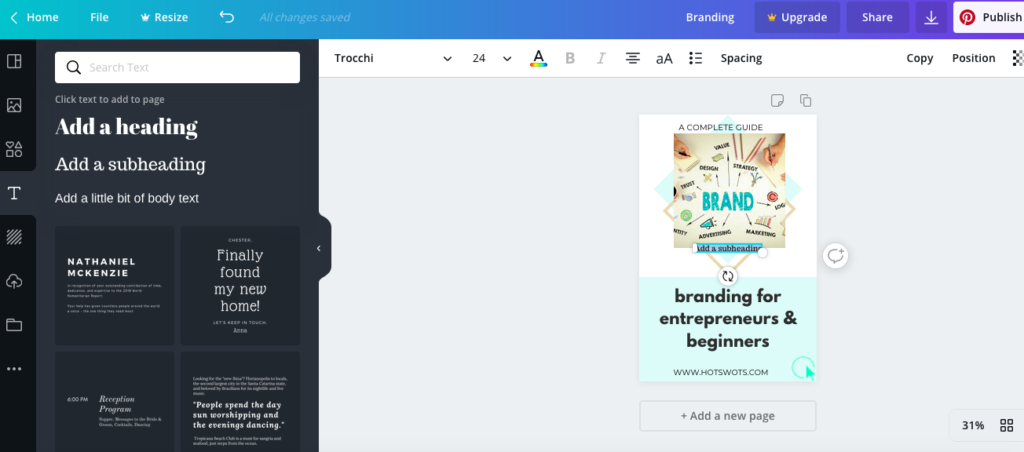
4. Add Your Own Branding
I always add my own branding – website address and my icon to all my images. Insert your icon or logo and then you can use the Position button to move it where you want (so it doesn’t overwrite other images inserted) and then resize by dragging the corners in or out. Any text you want to move just highlight and drag to position and you will get the guidelines to help you line it up with the centre of your image or other images and text.
5. Rename and Download
Highlight the name in the menu bar and rename. Additionally, it’s also a good idea at this stage to increase the size of your image to 100% so you can ensure text is spelt correctly. You can also check that you have covered other images underneath properly and it all looks balanced. Click on the 31% you can see bottom right of my screenshots and select 100%. It gives you a bigger image to check. Select the down arrow in the menu bar and download.

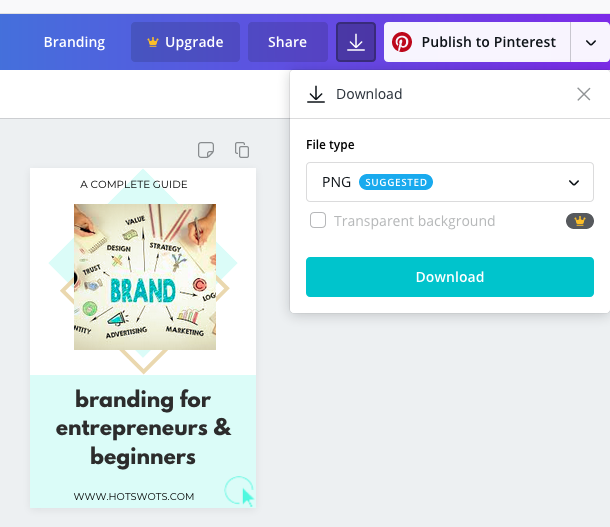
6. Final Image
At this point, we have our final social media image for Pinterest. Once you’ve downloaded it, check it again and make sure you are happy with it. If you do find anything misspelt etc, just go back into Canva and select it from your Home page under Your Designs, edit and re-download.
**************
7. Conclusion
Your image will automatically save to Your Designs under Create an Image section on the Home page. Just refresh your browser to see it. At any time you can select the back arrow icon in the menu bar on your edit page if you have made a mess and want to go back a step (or a couple!!).

In conclusion, this was a quick version but there are so many options in Canva that it is quite amazing. I have made eBooks, social media images, images for blog posts and banners plus more. You can even do customised sizes for anything special like your blog posts. Additionally, Canva has a paid option where it will automatically resize a social media image for another platform. This saves you heaps of time and energy.
Take some time to get used to resizing images, changing colours and fonts and making your own designs. The more images you design, the easier and quicker it will become.
Let me know in the comments below how you go designing your images in Canva. I’m sure our readers would love to hear as well.
Like this article or found it helpful? Share it!
Join us for updates, tips and inspiration on Facebook , follow us on Instagram and check out our Pinterest images.
Profit from our expertise and contact us for advice today.
Judith Shuttleworth
Latest posts by Judith Shuttleworth (see all)
- How to Add Sex Appeal to Your Marketing in 5 Easy Steps - 28/08/2019
- Creating an Irresistible Brand - 16/08/2019
- Copywriting Secrets – 6 Simple Rules - 31/07/2019